Possible Troubleshooting:
-
**Disable Automatic Firmware Updates**
-
Cartridge in Wrong Slot
-
I Can't Remove the Clip From the Cartridge
-
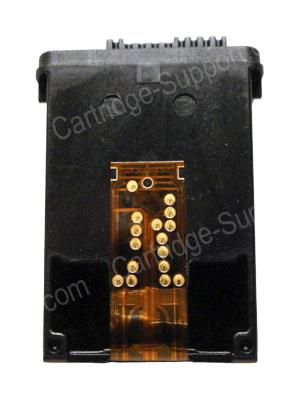
Ink level has been disabled
-
Inkjet cartridge is reporting that it is empty
-
Low (or empty) ink level
-
Message about printer warranty
-
Previously Used/Counterfeit Cartridge
-
Scratchy, banded or otherwise poor print quality
Select Troubleshooting
Compatible with following printers:
Comparable OEM Numbers:
(This product may also be associated with these numbers)
-
No compatibility information available. If you didn't find the solution, please contact us!
Related articles:
-
No related articles found. If you didn't find the solution, please contact us!
Additional Support
If you didn’t find the solution, please contact us!
To request product replacement, please click here.

Please select an issue you might be having with your cartridge from Possible Troubleshooting section
Installation Instructions Not Available
We're sorry, installation instructions for this product are not available at the moment. Our team is working on adding them, so please check back soon.
You can still view possible troubleshooting resources for this product in the menu on the left.
1. On the printers LCD screen, locate the "SETUP" icon on the main screen and press to select.
2. Scroll down and locate "TOOLS or Printer Maintenance" option and press to select.
3. Next, press "Update the Printer" from the available options.
4. Press "Printer Update Options".
5. Choose "Do Not Check”.
6. Do you want to turn on printer updates? Select "NO".
This option prevents the automatic installation of firmware updates that might otherwise eliminate your ability to use aftermarket printer cartridges.
Please note - Not all firmware updates disable cartridges, and some may contain important security updates. We suggest reviewing firmware release notes and periodically checking for critical security updates from your printer manufacturer so you can make an informed decision whether to install a particular firmware revision.***
This solution should also be attempted if you receive a message stating that your printer is printing in Single Cartridge Mode.
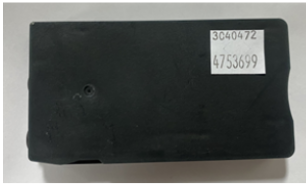
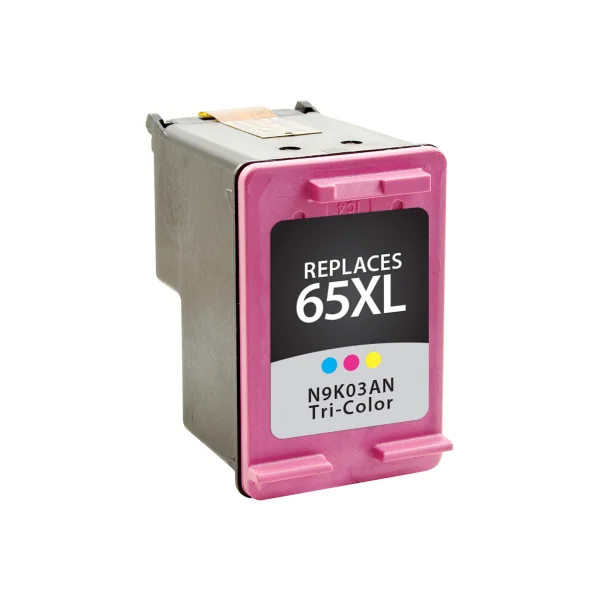
- Confirm that the cartridge pictured matches the cartridge you have in your hand or installed in your machine.
- Confirm that the printer you are using is listed in the printer compatibility table as a compatible printer for the cartridge you are trying to install.
- If ONE of these TWO criteria do NOT match, you have most likely received the incorrect cartridge for your printer. Please visit our PRINTER COMPATIBILITY page in order to determine what cartridge you need for your machine.
- Once you have confirmed you have the correct cartridge for your printer, open the cover on the printer and remove the cartridge.
- Upon removing the cartridge, you will need to locate the copper contacts. If the copper strip is missing, the cartridge will not function and will need to be replaced.
- If the copper strip is intact, you may need to clean the contacts from any type of obstruction or debris as this may be the cause of the error.
- You may use a pencil eraser to clean the contacts. Gently brush the copper strip with the pencil eraser to remove any potential obstruction or debris. You may also use any type of lint free cloth or a coffee filter. Again, gently wipe the copper strip with the lint free cloth removing any type of obstruction or debris.
- Once this is complete, replace the cartridge in the cradle, close the lid and then follow any on screen prompts that may appear.
If the problem persists after returning the cartridge to its cradle, you will want to reset your printer.
- This can be done by turning off your computer and your printer with the cartridges installed.
- Unplug your printer and leave your machines off for 2 minutes.
- Restart the printer and your computer, and attempt your print again.
If you have attempted both of these procedures and you encounter the same error, there is most likely an electrical problem with the cartridge, and you should return the cartridge to the place of purchase.
If you need to print right away and this troubleshooting did not solve the problem with your cartridge, please select the option entitled "One Cartridge Printing".
To remove this clip, place the cartridge on a solid surface. Holding the clip with one hand, press down on the cartridge with the other hand and pull back on the clip.
You may also find it helpful to think of the clip as the tab on a soda can. Place the cartridge on a solid surface with the clip at the top. Hold the cartridge in one hand and "peel" the clip back with the other.
Some resistance is normal so don't be alarmed.
You may notice some residual ink on the pad or some ink on the printhead of the cartridge. This is also normal as some clips serve to prime the cartridge in order to allow it to function properly.
Once the clip has been removed, you may install the cartridge into your printer as normal.
If you need to print right away and this troubleshooting did not solve the problem with your cartridge, please select the option entitled "One Cartridge Printing"
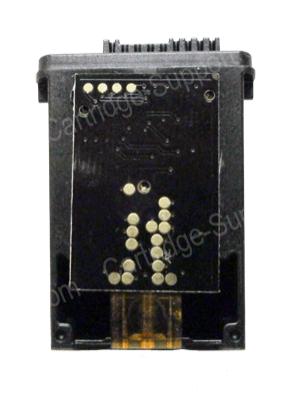
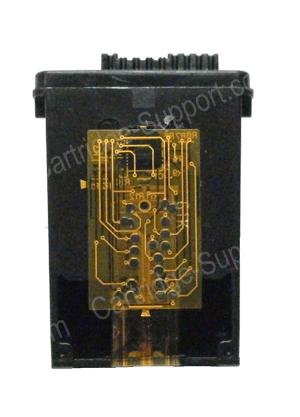
If your cartridge contains a patch over the copper contacts as shown above, you may be able to allow the printer to read the ink levels by cleaning the electrical patch. Simply use a lint free cloth (such as a coffee filter) or a pencil eraser to gently clean the contacts from any obstruction or debris. Reinstall the cartridge and follow any on-screen prompts.
If the problem persists, reset your printer by turning off your computer and the printer (with the cartridges installed). Leave your machines off for 2 minutes, and then restart. If neither of these troubleshooting tips help, your cartridge should be returned to the place of purchase.
However, if your cartridge does not have a patch over the contacts, DO NOT be alarmed.
A low/empty ink message is very common because you are using a remanufactured inkjet.
The ink gauge on your printer will no longer read the ink levels correctly because it does not recognize your cartridge as “new”. This message can be bypassed easily when necessary and will not affect your printing performance.
Keep in mind that the ink gauges on printers only serve as an ESTIMATE of how much ink may be remaining in the cartridge.
To continue printing, click ok or continue through any printer prompts, if applicable, to allow the printer to finish printing.
Or you may press ok on your printer’s LCD screen, if it has one.
If your printer has an LCD screen but you do not see an option to bypass the low ink message (or if pressing "OK" does not eliminate the error), please click here for an example of what to look for on your printer.
It is important to note that most remanufactured inkjet cartridges are 100% guaranteed. Most manufacturers warrant against any damage to your printer.
In order to continue or begin using your printer, click OK or Continue to dismiss the printer prompts that appear on your screen after installing the remanufactured cartridges. Do not click "Cancel".
This message may reappear prior to the depletion of your cartridge. Please follow the same procedure to dismiss the message if this does occur.
If you did click "Cancel", click here for more information.
Your rights as a consumer are protected under the Magnuson-Moss Warranty Federal Trade Commission Improvement Act, Subparagraph C, Section 101.
"The use of a non-HP ink cartridge or a refilled ink cartridge does not affect either the warranty to the customer or any HP support contract with the customer."
Please click here for more information How to respond to Warranty messages
You may also encounter an error stating that "HP's ink cartridge and printer warranties do not cover repairs or service due to the use of non-HP cartridges or non-HP ink".
It is important to note that most remanufactured inkjet cartridges are 100% guaranteed. Most manufacturers warrant against any damage to your printer.
In order to continue or begin using your printer, click OK (or Continue) to dismiss the printer prompts that appear on your screen after installing the remanufactured cartridges. You may also press OK on your printer's LCD screen if it has one. Do not press Cancel. If you pressed Cancel and receive a message about Cartridge Protection, please click here for more information.
This message may reappear prior to the depletion of your cartridge. Please follow the same procedure to dismiss the message if this does occur.
Your rights as a consumer are protected under the Magnuson-Moss Warranty Federal Trade Commission Improvement Act, Subparagraph C, Section 101.
"The use of a non-HP ink cartridge or a refilled ink cartridge does not affect either the warranty to the customer or any HP support contract with the customer."
Please click here for more information.
This video will show you an example of how to perform a cleaning cycle through your printer's control panel. If your printer does not have a control panel, please select the troubleshooting for "Performing a Cleaning Cycle from your Computer" for further assistance.
Please keep in mind that this process may vary by printer and that you may also consult your printer's user manual for instructions on performing a cleaning cycle.
- Press the wrench icon on your printer
- Scroll to Tools and press OK
- Scroll to Clean Printhead and press OK
- When the cleaning cycle is complete, your printer will print a test page.
- If the quality on the test page is satisfactory, press OK to exit the cleaning cycle. You may return to the document you wish to print and resume printing.
- Or you may also perform another cleaning cycle if you are not satisfied with your test page.
Please be aware that cleaning your printhead does consume ink; and therefore, should only be completed when necessary.
If the print on your test page is satisfactory, you may return to the document you wish to print and resume printing.
If you are still not satisfied with the print, the next step is to try blotting the cartridge in order to make sure that the printhead nozzles are not clogged with dry ink.
- You will want to use a lint free towel such as a coffee filter. Fold the filter in half.
- We also suggest using a paper towel or other absorbent material to place under the lint free cloth to protect your surface from the ink as it may stain your underlying surface.
- Remove your cartridge from the printer.
- Locate the printhead. This is on the bottom of the cartridge. Do not touch the printhead or bottom of your cartridge as this can damage the cartridge.
- Hold the cartridge with the printhead facing downward.
- Simply press the printhead of the cartridge onto the coffee filter and hold for 3 seconds.
- Upon lifting the cartridge back up, three (3) colors should appear on the lint free cloth.
If a good blot does appear on the cloth, reinstall your cartridge and attempt your print again.
If your cartridge does not provide a good blot, it is possible that the ink has all been consumed; and you should replace your cartridge.
If you need to print right away and this troubleshooting did not solve the problem with your cartridge, please select the option entitled "One Cartridge Printing"
* Page yield based on prints At 5% coverage.