Product Installation Video
Select Installation Video
Possible Troubleshooting:
-
Ink System Failure Message
-
User Intervention Required
-
Alignment Error/Alignment Page Does Not Print Properly
-
Cartridge indicates missing/damaged/incompatible/ incorrect/unsupported/has a problem
-
My Cartridge Is Expired
-
My printer does not recognize my cartridge
-
Unsatisfactory print or missing colors
Select Troubleshooting
Compatible with following printers:
HP Photosmart C5150 All-in-One
HP Photosmart C5180 All-in-One
HP Photosmart C6150 All-in-One
HP Photosmart C6154 All-in-One
HP Photosmart C6170 All-in-One
HP Photosmart C6175 All-in-One
HP Photosmart C6180 All-in-One
HP Photosmart C6183 All-in-One
HP Photosmart C6185 All-in-One
HP Photosmart C6188 All-in-One
HP Photosmart C6190 All-in-One
HP Photosmart C6240 All-in-One
HP Photosmart C6250 All-in-One
HP Photosmart C6280 All-in-One
HP Photosmart C7150 All-in-One
HP Photosmart C7170 All-in-One
HP Photosmart C7180 All-in-One
HP Photosmart C7183 All-in-One
HP Photosmart C7186 All-in-One
HP Photosmart C7188 All-in-One
HP Photosmart C7190 All-in-One
HP Photosmart C7250 All-in-One
HP Photosmart C7280 All-in-One
HP Photosmart C7283 All-in-One
HP Photosmart C7288 All-in-One
HP Photosmart C8150 All-in-One
Comparable OEM Numbers:
(This product may also be associated with these numbers)
-
No compatibility information available. If you didn't find the solution, please contact us!
Related articles:
-
No related articles found. If you didn't find the solution, please contact us!
Additional Support
If you didn’t find the solution, please contact us!
To request product replacement, please click here.

Please select an issue you might be having with your cartridge from Possible Troubleshooting section
Installation Instructions Not Available
We're sorry, installation instructions for this product are not available at the moment. Our team is working on adding them, so please check back soon.
You can still view possible troubleshooting resources for this product in the menu on the left.
The error shown below most often indicates that a printhead or printheads in your machine need to be replaced. If powering the printer off and then on again did not eliminate the error, removing all of the cartridges and reinstalling them may resolve the issue.
If you still receive the error message after completing these steps, you should replace the printhead(s). Please consult your printer's user manual (or the OEM website) for instructions on how to change the printhead in your machine and the suggested maintenance for your printer.
Please note that printheads are a consumable item. They may need to be replaced periodically throughout the life of your printer to ensure the best printing quality.

The error pictured above may not look identical to yours, but the same information applies to the cartridge you have chosen to troubleshoot.
- Restart both your printer and computer and attempt your print again
If that does not resolve the error, please try to clear the Print Spooler:
- Search Windows for Services, and then click Services in the list of results. (The Search Bar can be found by clicking the Windows button in the lower left corner of the screen.)
- Select Print Spooler from the alphabetical list.
- Right-click Print Spooler and choose "Stop".
- Open Windows Explorer (the icon that looks like a file folder).
- Select the (C:) drive in the left pane under "Computer".
- Double-click the Windows folder.
- Scroll down and open the "System32" folder.
- Open the "spool" folder and delete all files inside the PRINTERS folder.
- Restart your computer and attempt your print again
If you have attempted both of these procedures and you encounter the same error, there is most likely an electrical problem with the cartridge, and you should return the cartridge to the place of purchase.
If you need to print right away and this troubleshooting did not solve the problem with your cartridge, please select the option entitled "One Cartridge Printing".
Remove the cartridge from your printer and locate the chip. Ensure that the chip is in place; and if so, you will want to clean it from any obstruction or debris as this may be preventing the alignment from completing.
Using a lint free cloth (such as a coffee filter), gently wipe the chip to remove any obstruction or debris.
Reinstall your cartridge into the printer (making sure it clicks into place), and attempt the alignment process again.
If the error continues, it may be necessary to perform a cleaning cycle to improve the quality of the print and allow the alignment process to be completed. Every printer is different so please consult your printer’s user manual for instructions on performing a cleaning cycle on your printer.
If you are not able to perform a cleaning cycle or if the alignment fails even after performing a cleaning cycle, please ensure that the scanner glass is clean and free from fingerprints or debris (this applies to certain models only).
If these steps do not allow the printer to align the cartridge(s), you will need to return the cartridge(s) to the place of purchase.
Begin by removing the cartridge that is causing the error from its cradle.
Once the cartridge is removed, confirm that there is a chip intact and in the correct location.
If the chip is missing, you should return the cartridge to its place of purchase.
If the chip is in place, you may need to clean it from any type of obstruction or debris as this may be the cause of the error.
- To clean the chip you may use a pencil eraser.
- Gently brush the chip with the eraser to remove any potential obstruction or debris.
- Or, you may use any type of lint free cloth such as a coffee filter.
- Gently wipe the chip with the cloth, again removing any type of obstruction or debris.
- Once this is complete, replace the cartridge in the cradle, close the lid and then follow any on screen prompts that may appear.
If the problem persists after returning the cartridge to its cradle, you will want to reset your printer.
- This can be done by turning off your computer and your printer with the cartridges installed.
- Unplug your printer and leave your machines off for 2 minutes.
- Restart the printer and your computer, and attempt your print again.
If you have attempted both of these procedures and you encounter the same error, there is most likely an electrical problem with the cartridge, and you should return the cartridge to the place of purchase.
If you have just installed the cartridge, please contact the seller of your remanufactured inkjet for a replacement.
Begin by removing the cartridge that is causing the error from its cradle.
Once the cartridge is removed, confirm that there is a chip intact and in the correct location.
If the chip is missing, you should return the cartridge to its place of purchase.
If the chip is in place, you may need to clean it from any type of obstruction or debris as this may be the cause of the error.
- To clean the chip you may use a pencil eraser.
- Gently brush the chip with the eraser to remove any potential obstruction or debris.
- Or, you may use any type of lint free cloth such as a coffee filter.
- Gently wipe the chip with the cloth, again removing any type of obstruction or debris.
- Once this is complete, replace the cartridge in the cradle, close the lid and then follow any on screen prompts that may appear.
If the problem persists after returning the cartridge to its cradle, you will want to reset your printer.
- This can be done by turning off your computer and your printer with the cartridges installed.
- Unplug your printer and leave your machines off for 2 minutes.
- Restart the printer and your computer, and attempt your print again.
If you have attempted both of these procedures and you encounter the same error, there is most likely an electrical problem with the cartridge, and you should return the cartridge to the place of purchase.
Please attempt the following procedures in order to do so. Please keep in mind that this process may vary by printer and that you may also consult your printer’s user manual for instructions on performing a cleaning cycle.
- Select the HP Solution Center link on your desktop. You may find this by going to the Start Menu on your PC.
- Select All Programs
- Select HP from the menu that appears.
- Select HP Solution Center from the menu
- Next, select Settings.
- Then choose Printer Tool Box located under the printer settings category.
- Next, you will select “clean print heads”
- Select Clean
- You will observe your printer performing a cleaning cycle.
- Once the cycle is complete, your printer will print a test page.
Once the test page has been printed you may select DONE, or you can also perform another cleaning cycle if you are not satisfied with your test page.
Please be aware that cleaning your printhead does consume ink; and therefore, should only be completed when necessary.
If the print on your test page is satisfactory, you may return to the document you wish to print and resume printing.
If your test page is unsatisfactory after performing the cleaning cycles, you may need to replace your inkjet cartridges.
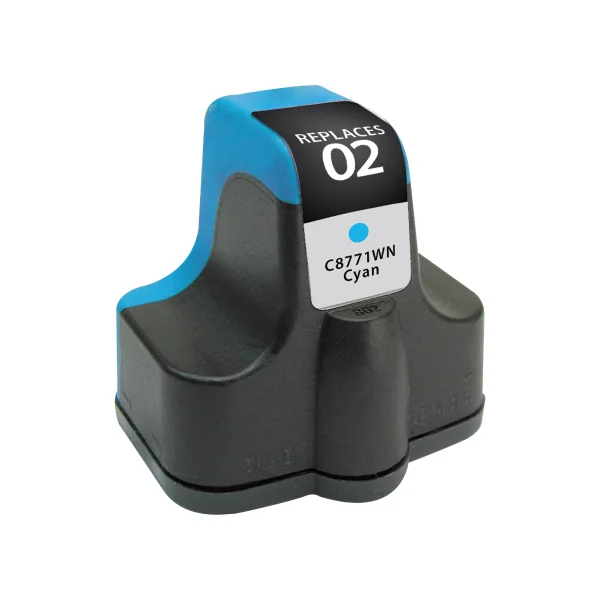
Confirm that the replacement cartridge contains the same symbol that is above where the cartridge is installed into the printer.
Now your cartridge may be installed into the printer.
*The cartridge and printer shown may vary from yours, but the general installation instructions are the same.
* Page yield based on prints At 5% coverage.